Webooks
What are Webhooks?
Webhooks are a way of sending data on an event or trigger. You can then use automation services like Zapier or IFTTT to perform an action when that data is received.
Why Webhooks?
Webhooks allow users to integrate Flotes with just about any well-known application. With maximum flexibility and customization.
Using the on_study_complete event as an example, you could schedule your next study session:
- As a Trello card
- As a Todoist todo
- As a database item in Notion
- As a note in Evernote
- As an event in Google Calendar
Available Webhook Events
On Study Complete
- Fired after completing a study session
Payload
title
description
next_study_date
notebook_id
On Notebook Archived
- Fired after archiving a notebook
valueis all notes values, similar to what’s shown on the summary screen.
Payload
title
description
value
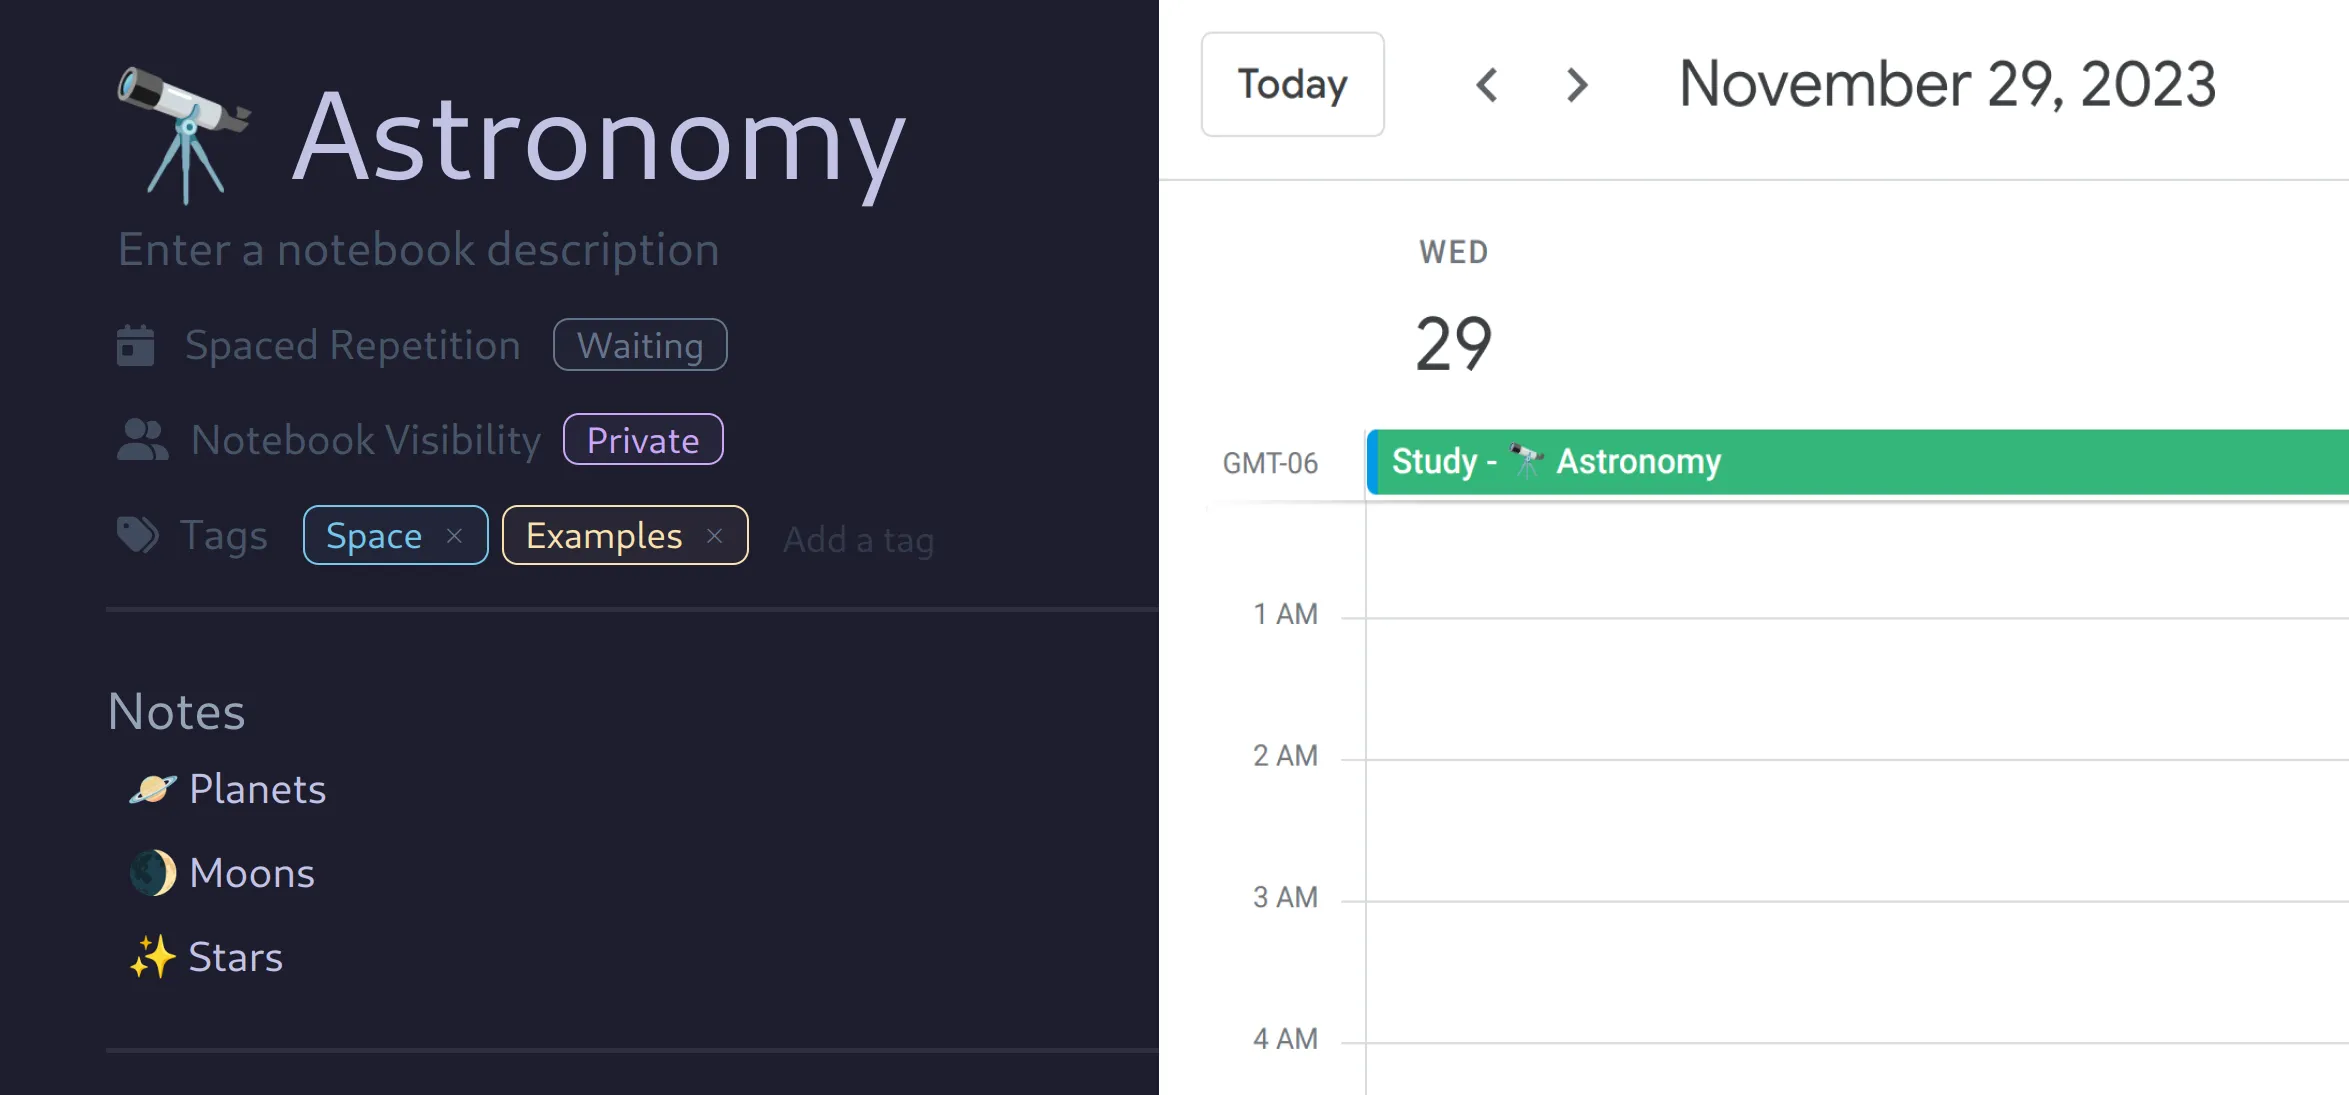
notebook_idGoogle Calendar Integration (Example)
When you complete a study session, Flotes can send data about that event (like the next scheduled study date) to a service like Zapier. You can configure a workflow in Zapier to do just about anything with that data.
In our example, when we complete a study session, we’ll automatically schedule the next study date in our Google Calendar.
Creating Your First Webhook
First create a new “Zap”. A Zap always starts with a trigger. Select Webhooks by Zapier
- Important: Webhooks are labeled premium. However, You do not need Zapier premium to use Webhooks like this.
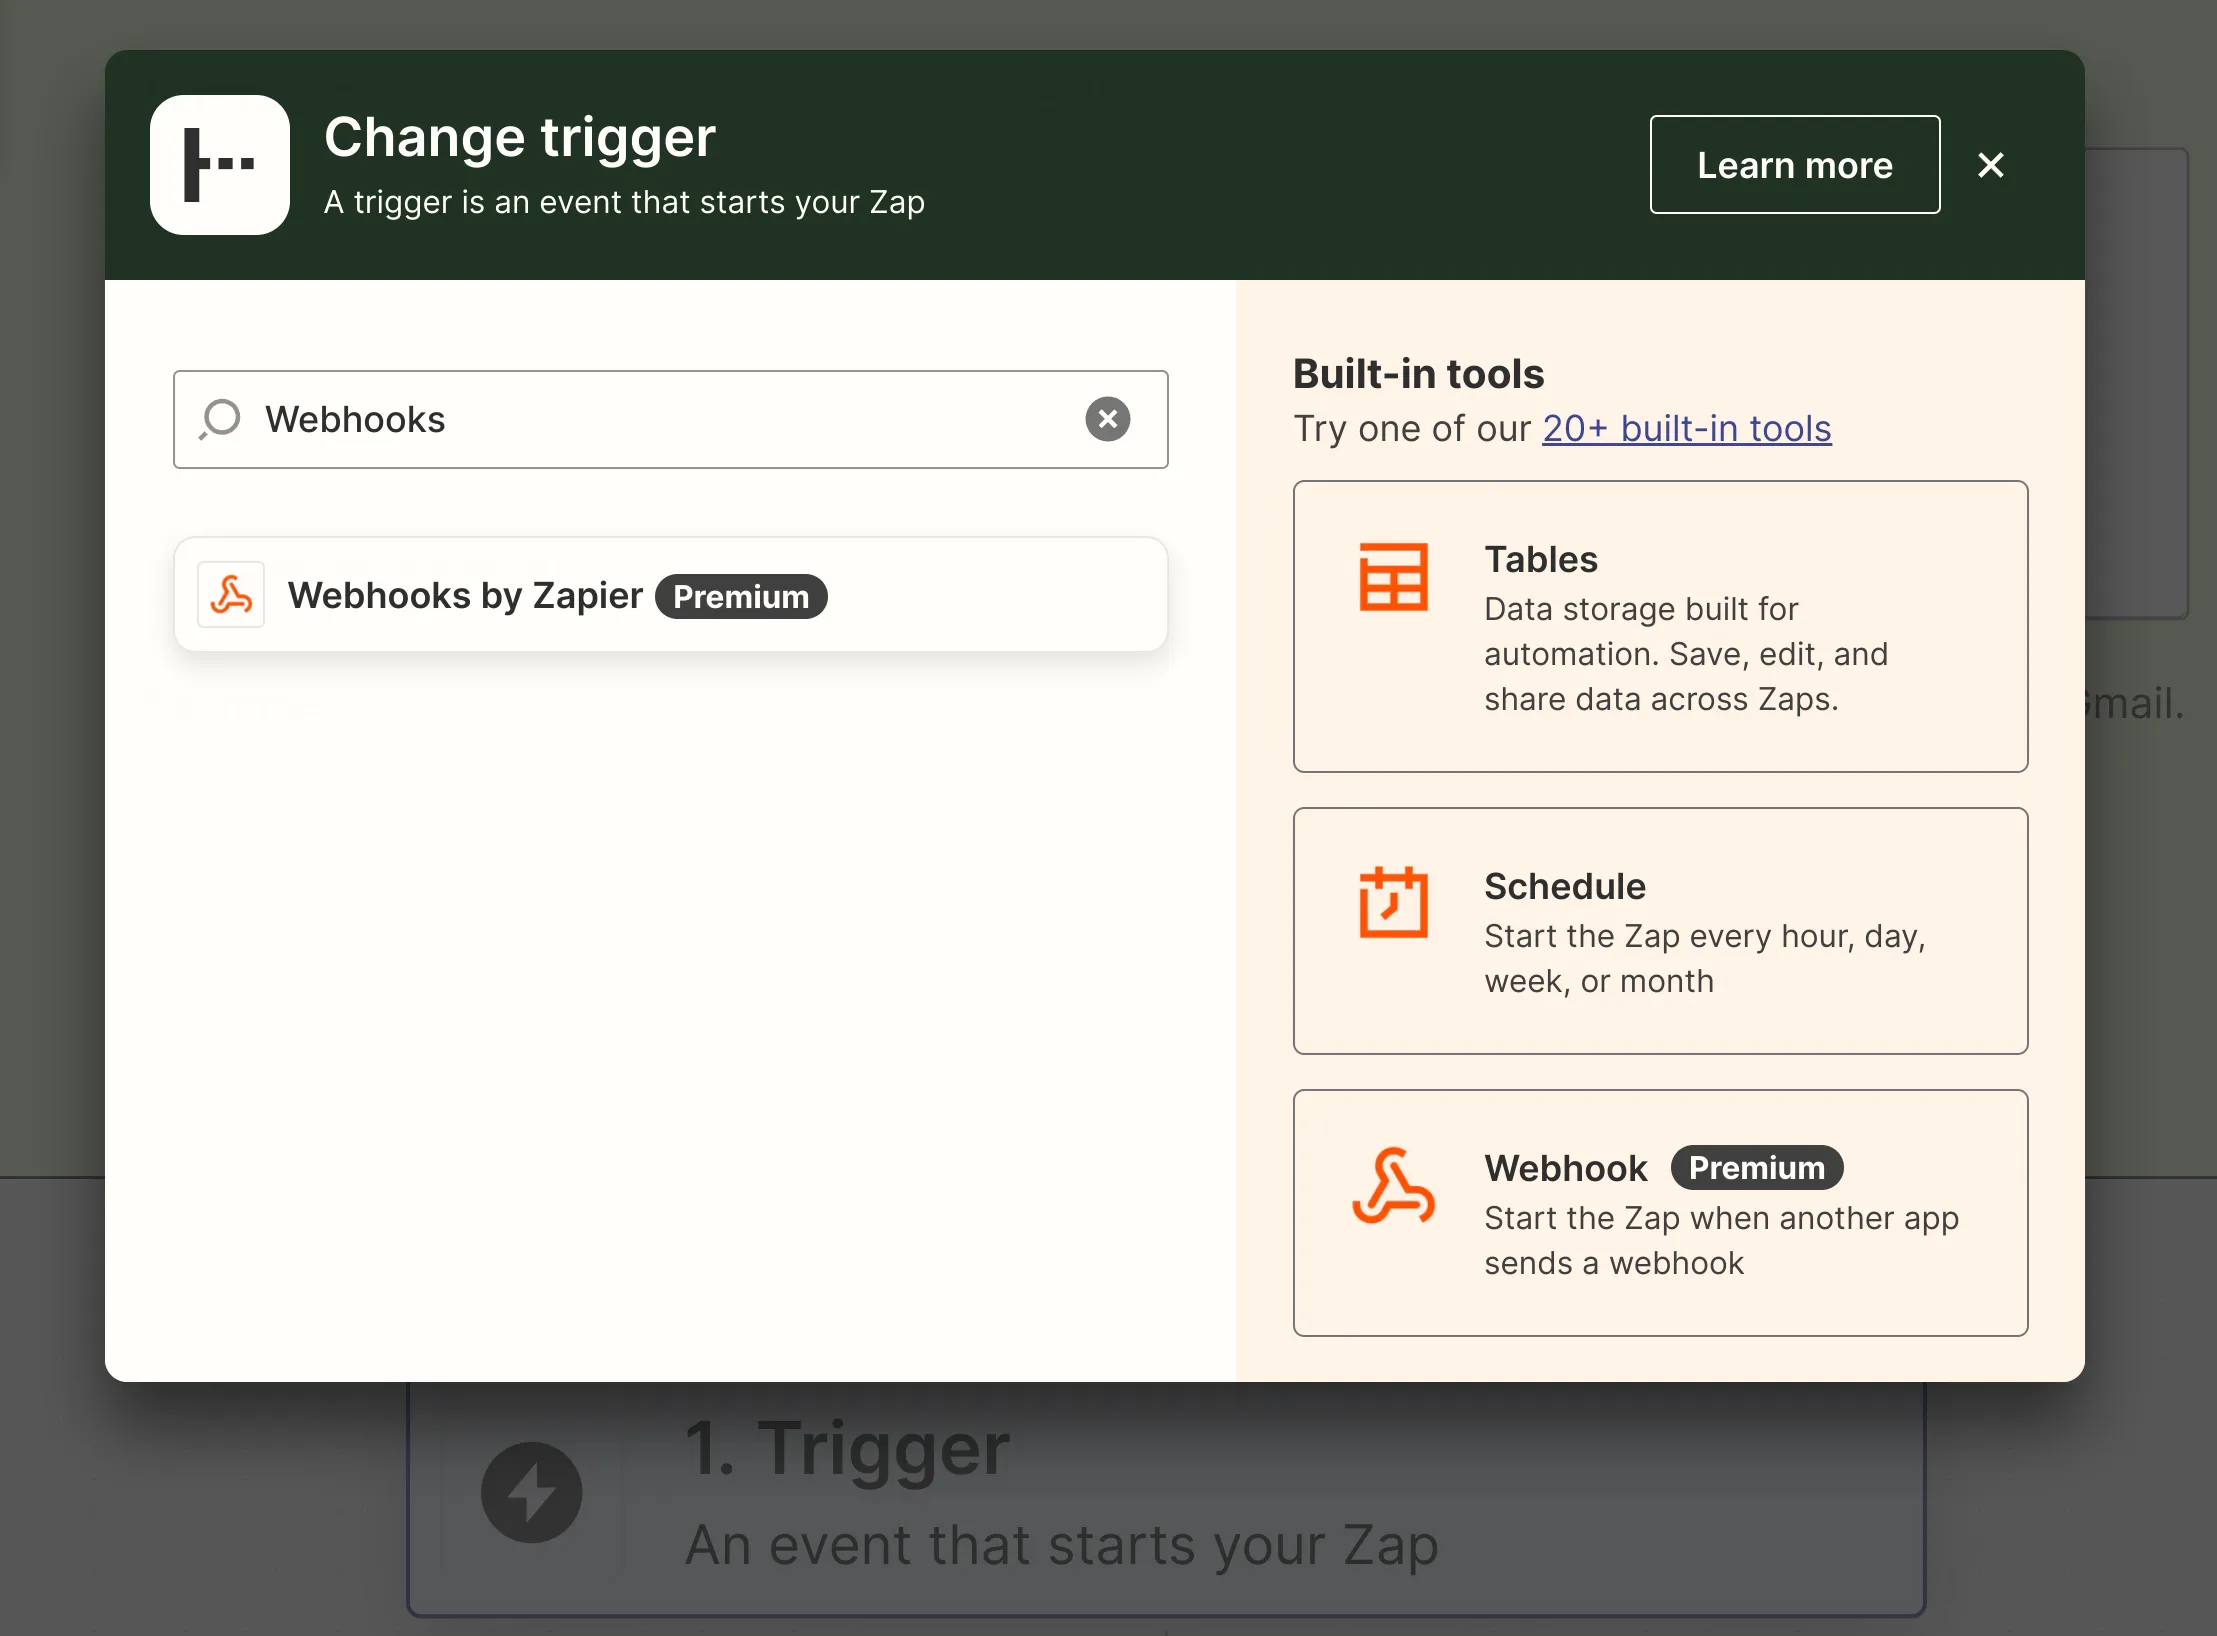
When prompted for an event, select Catch Hook.
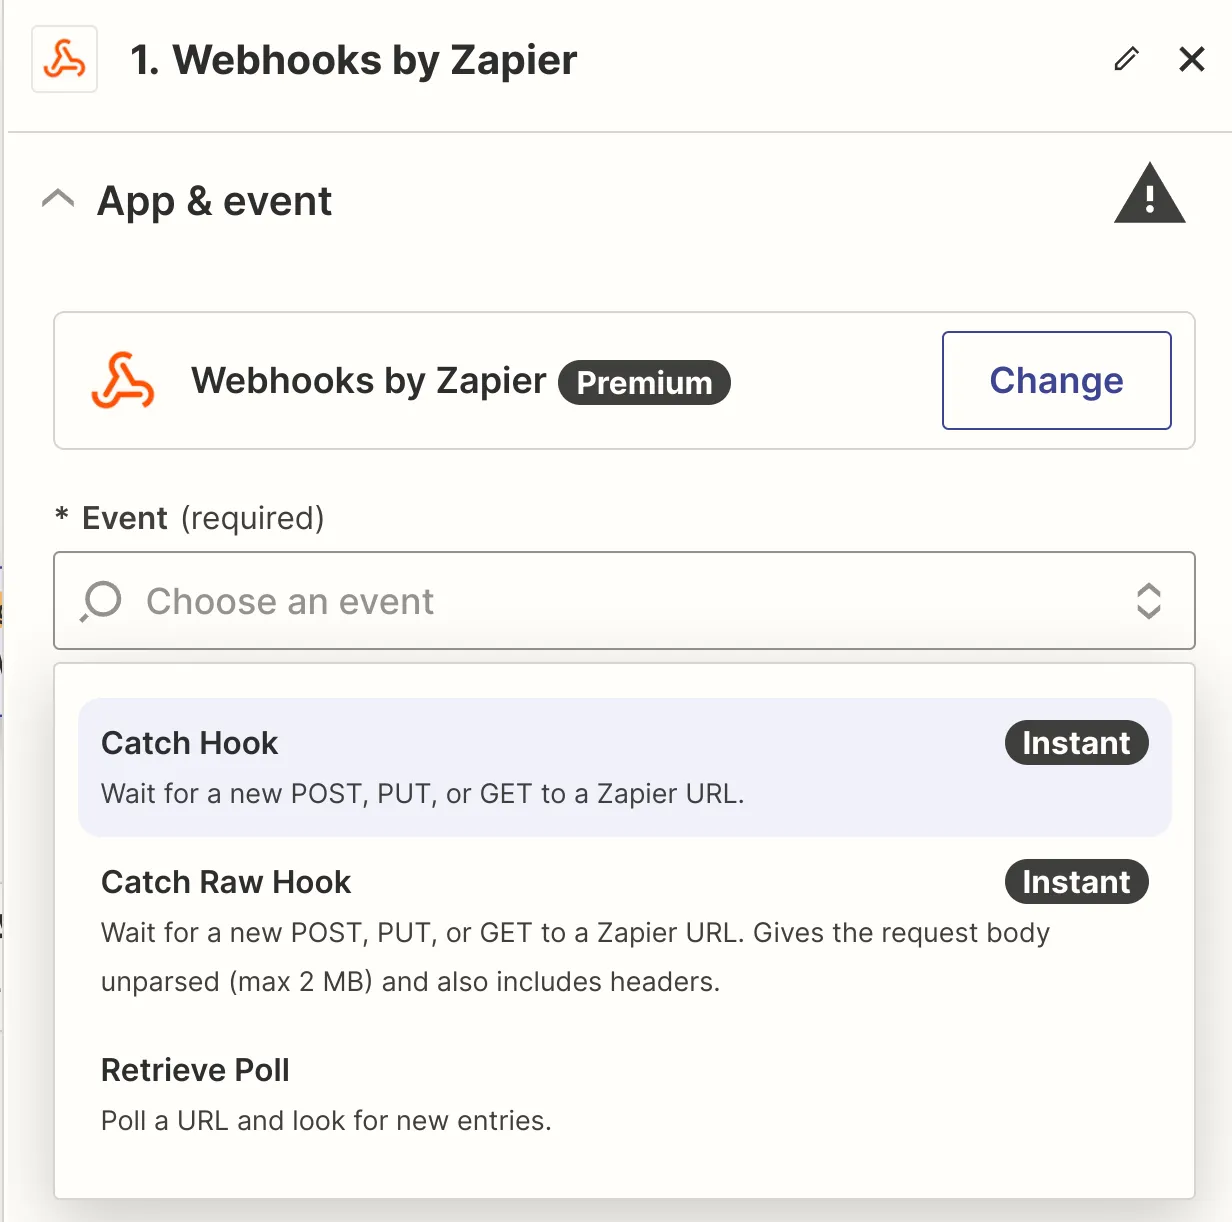
In Zapier, you should see a Webhook URL. - Copy this value.
Configuring the Webhook in Flotes
Now, open Flotes and navigate to your Webhook configuration (preferences —> webhooks).
Paste the URL into the input labeled Study Complete. This Webhook will fire whenever you complete a study session. For now, we’ll use Flotes Test button to manually test our Webhook.
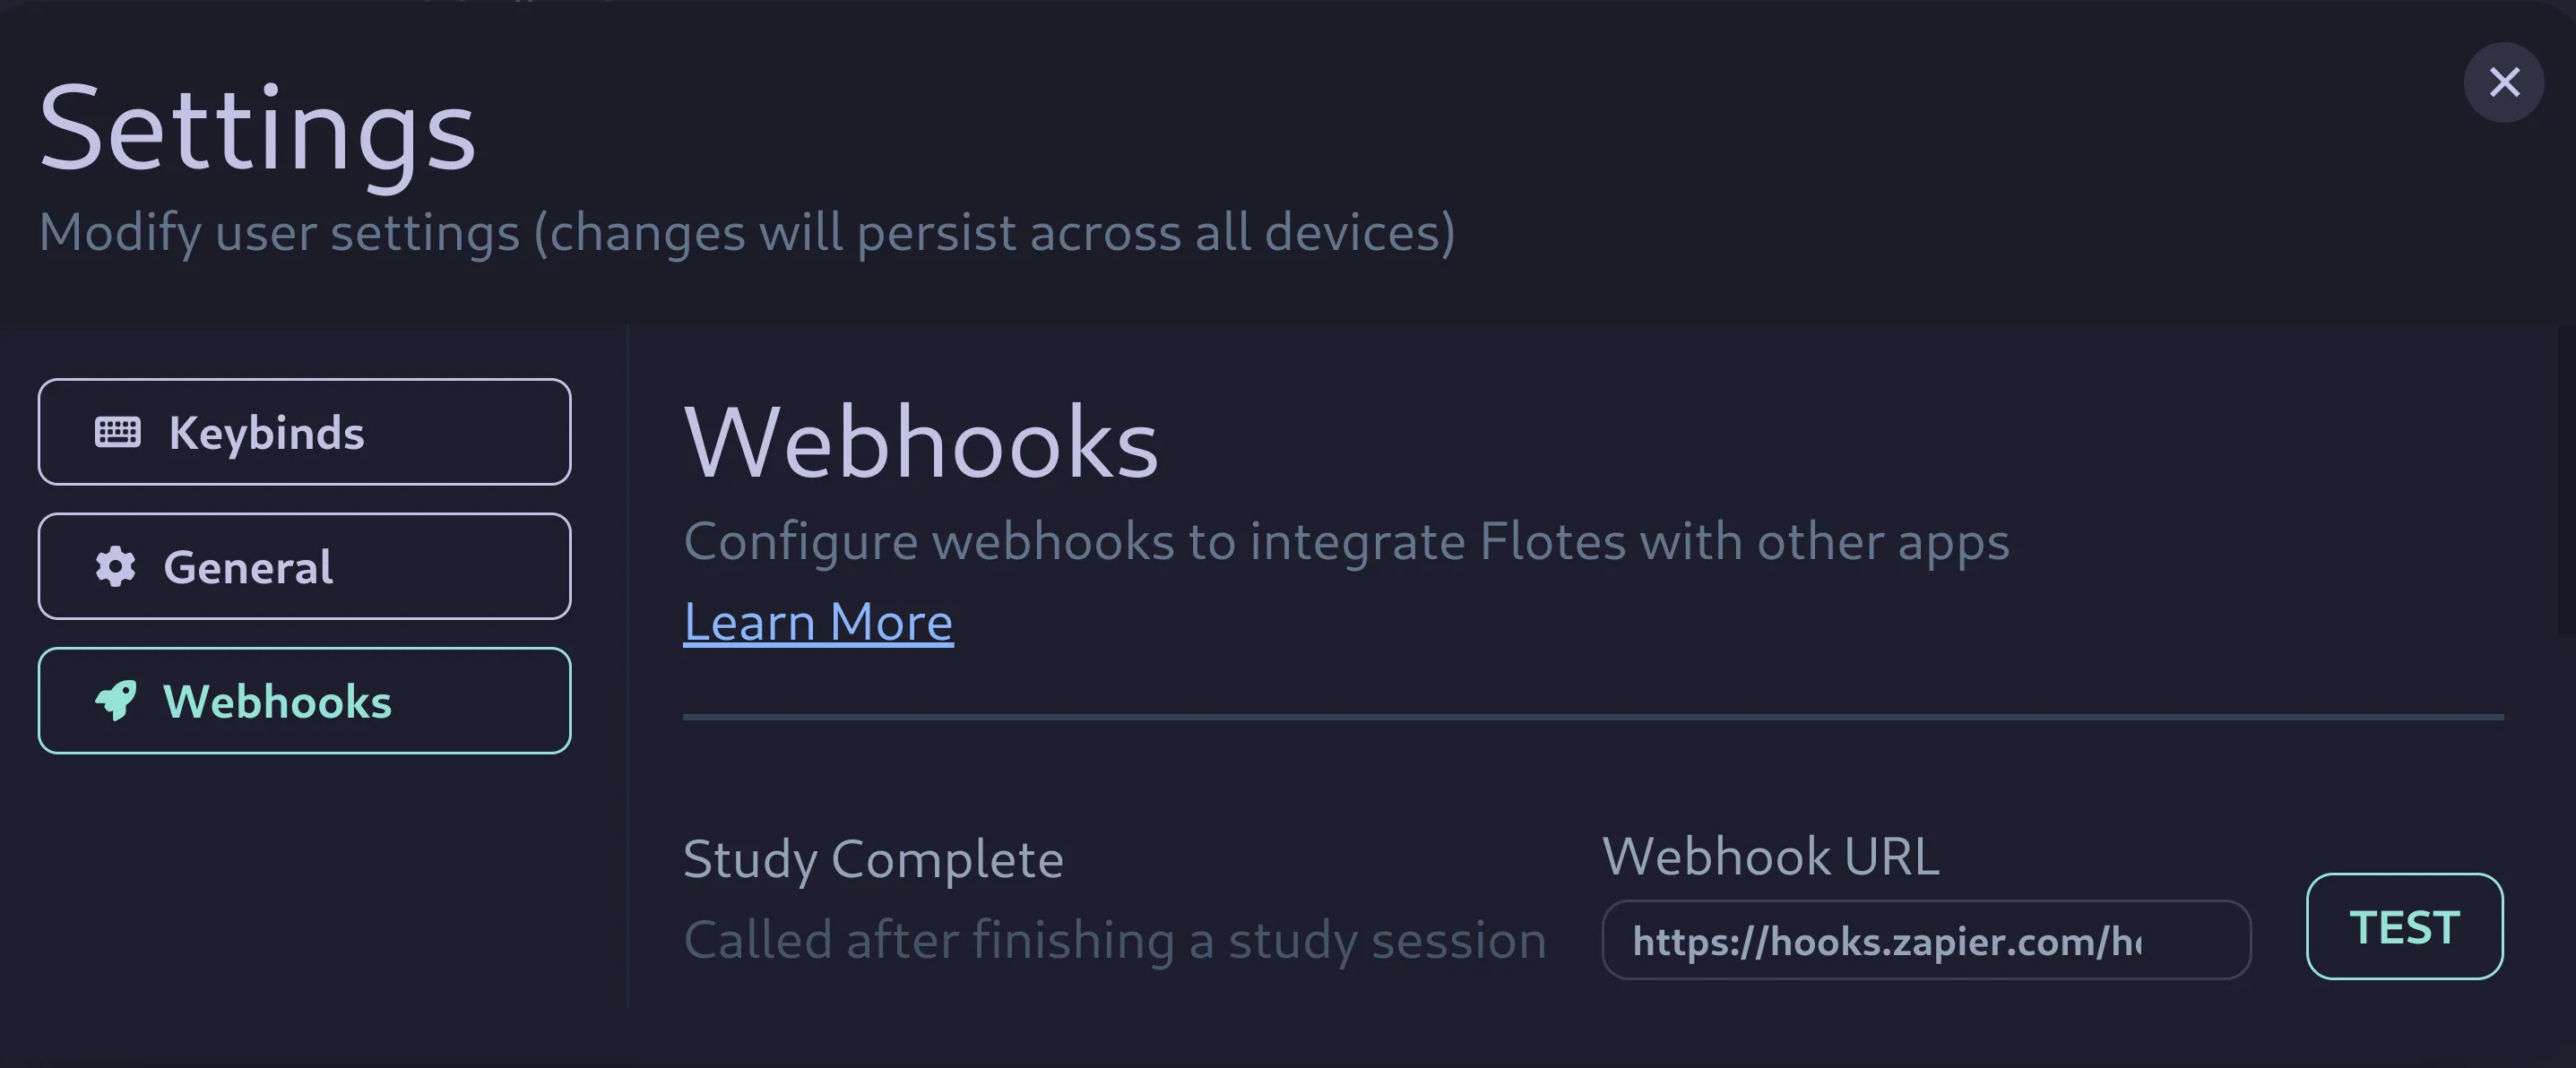
Press the “Test” Button after adding your Webhook URL.
Receiving the Data in Zapier
Now, Back in Zapier, you should see a record found. This will display all of the data received from Flotes. The “Test” button sends fake data that we can use to validate our Zap.
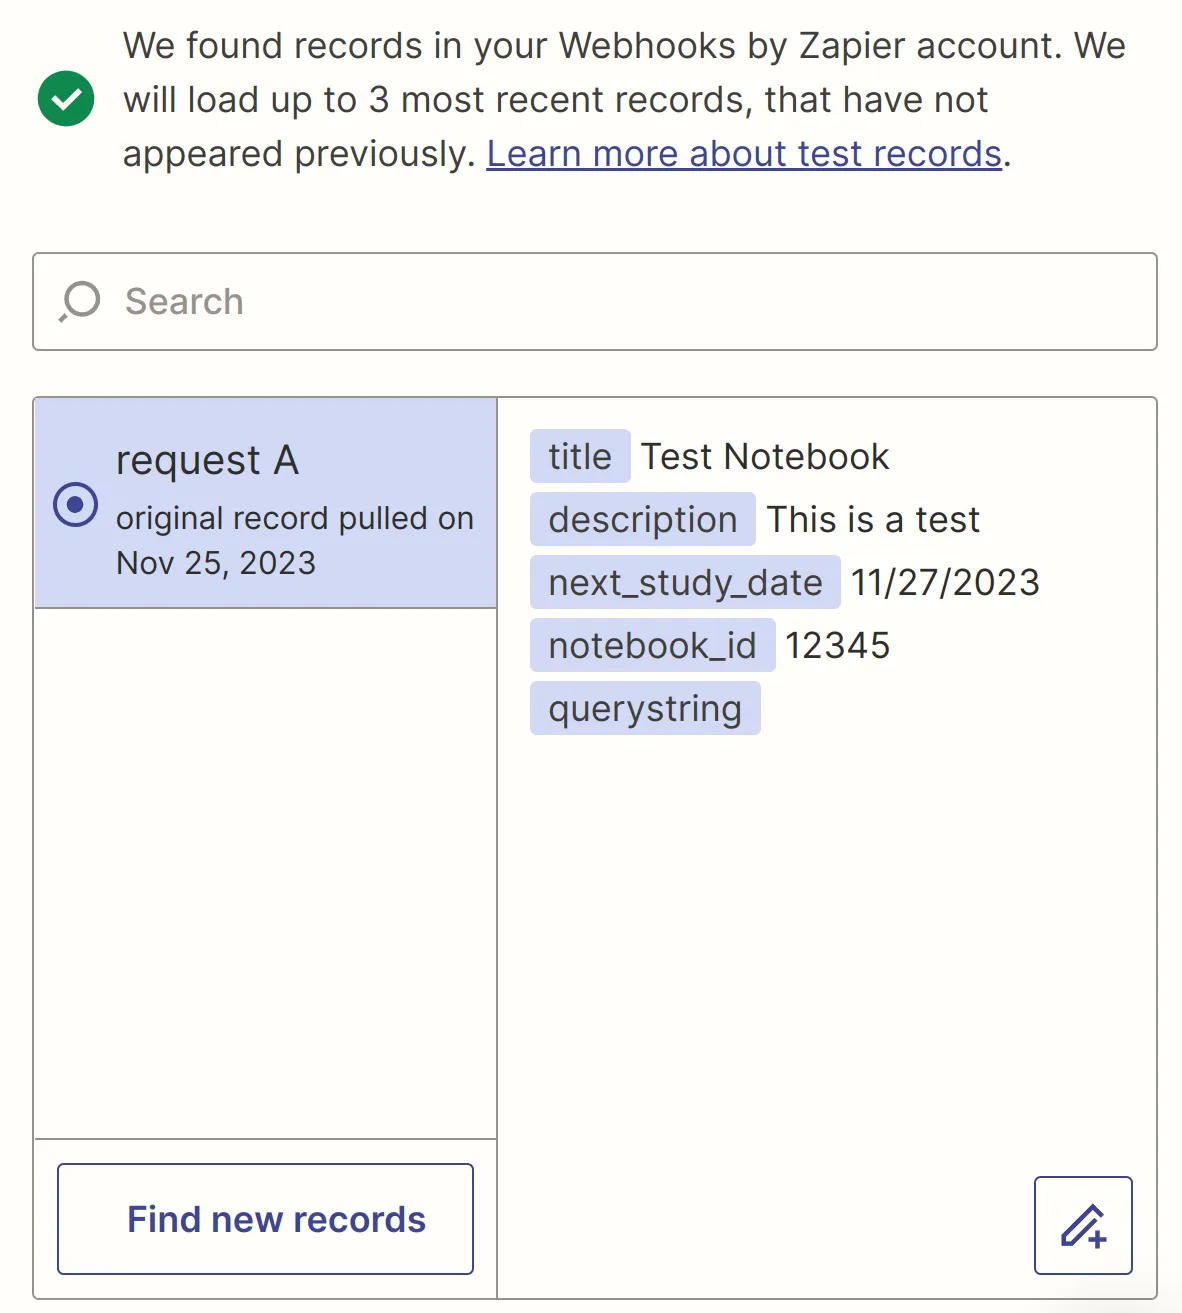
Continue to the next step. This is where we determine what happens when our Webhook receives an event!
Setting up Google Calendar
Search for and select Google Calendar. You may be prompted to authenticate after selecting.
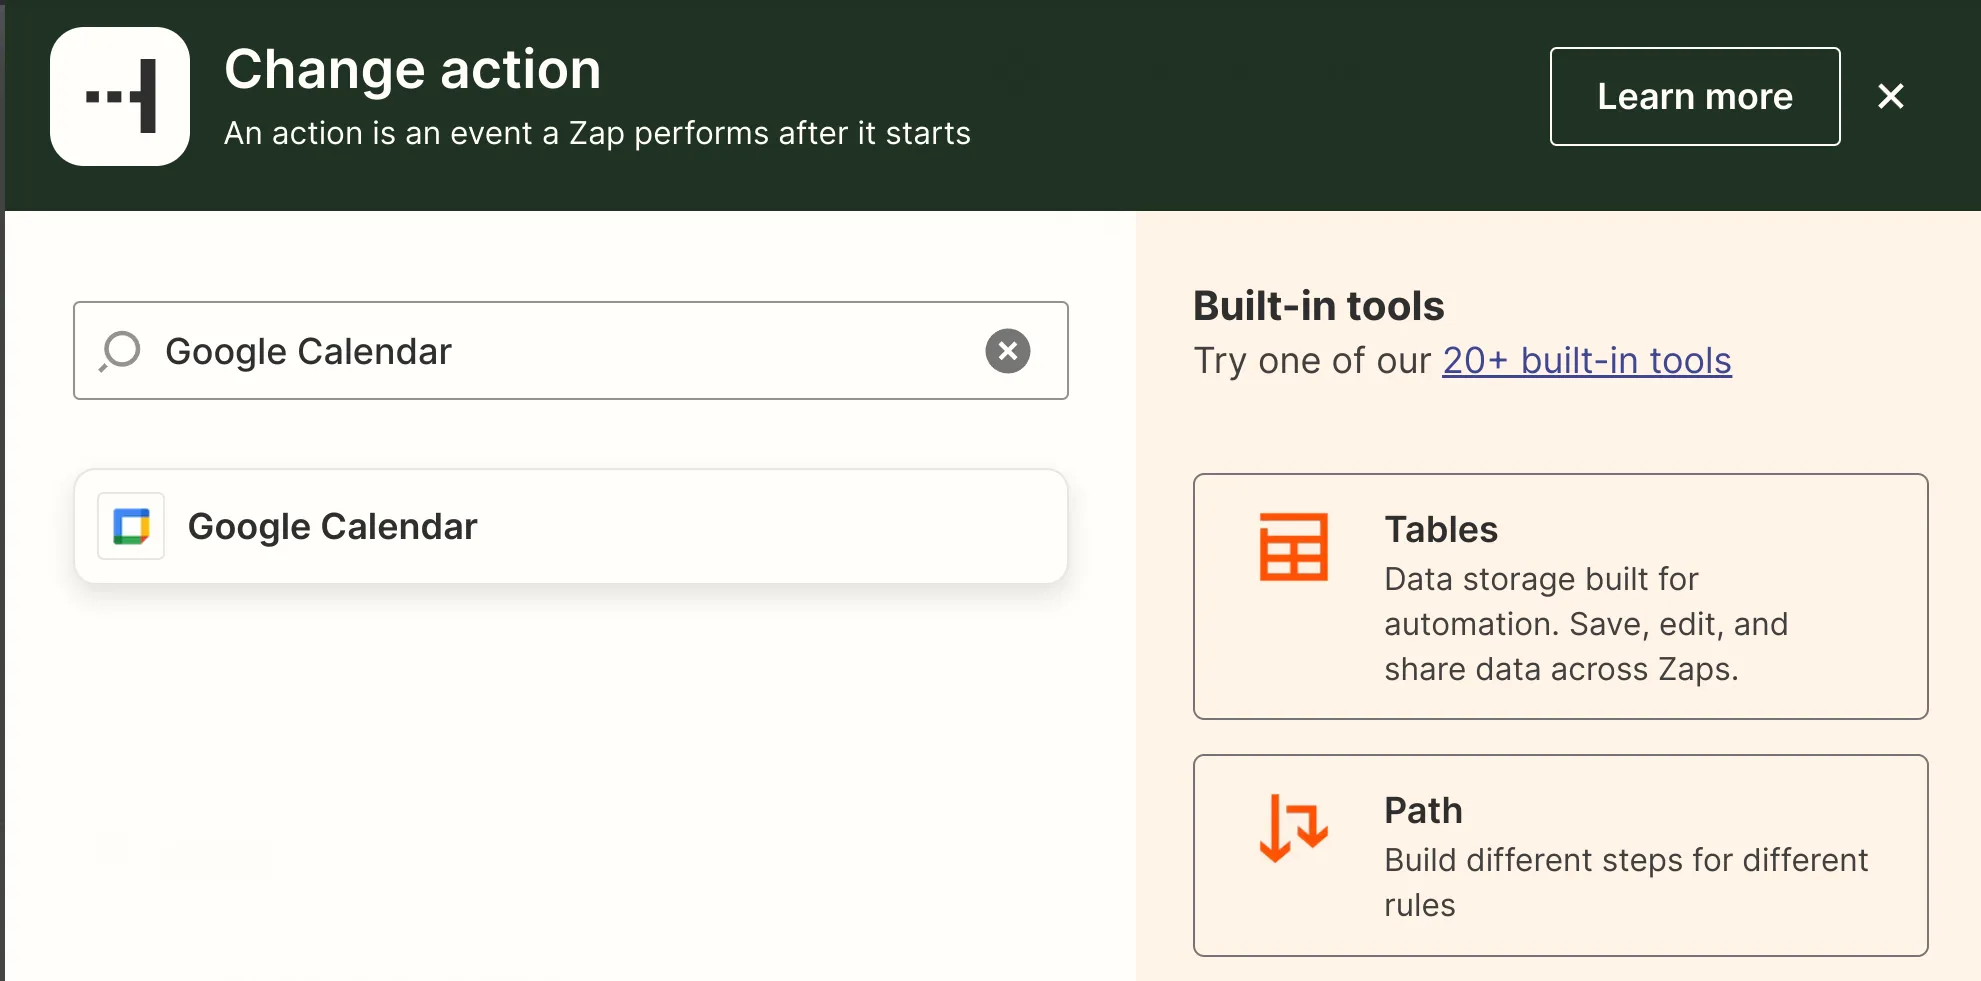
Select the type of Google Calendar event that you’d like to execute. For our example, we’ll choose Create Detailed Event.

Setting Values
Remember the fields from our test run? Now, when we select a field, Zapier will prompt us to choose one of those fields.
For example, we can set the Start Date & Time to our Next Study Date.
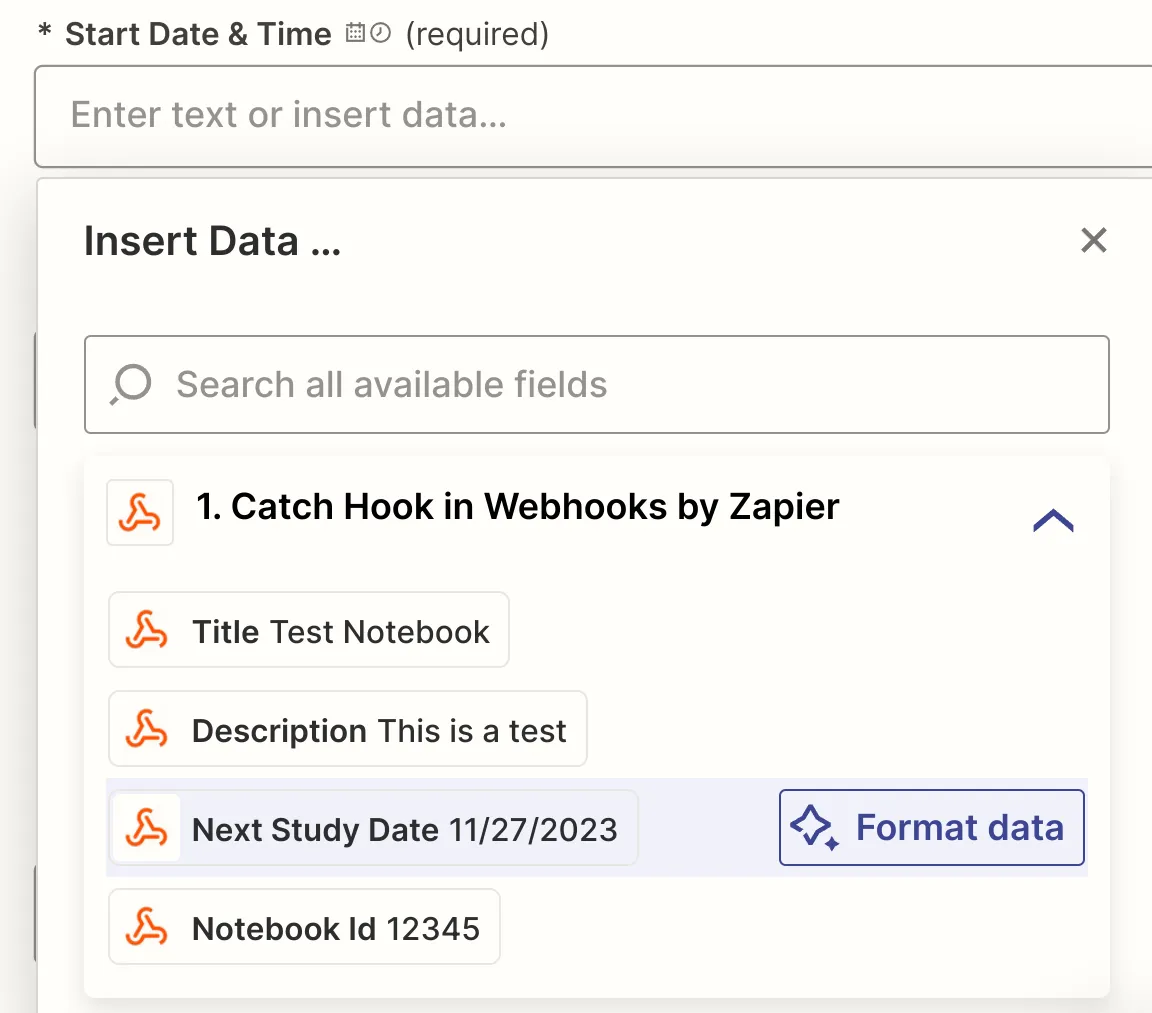
We can also add any plain text in conjunction with these fields. For example, the title of our calendar event is Study - [TITLE].
You can follow the example below. Or, fill out the various fields however you see fit.

Publishing the Webhook
Now we’re ready to publish. You can press the Test button in Zapier to manually test the complete process. If everything is configured correctly, you should see your event in your Google Calendar.
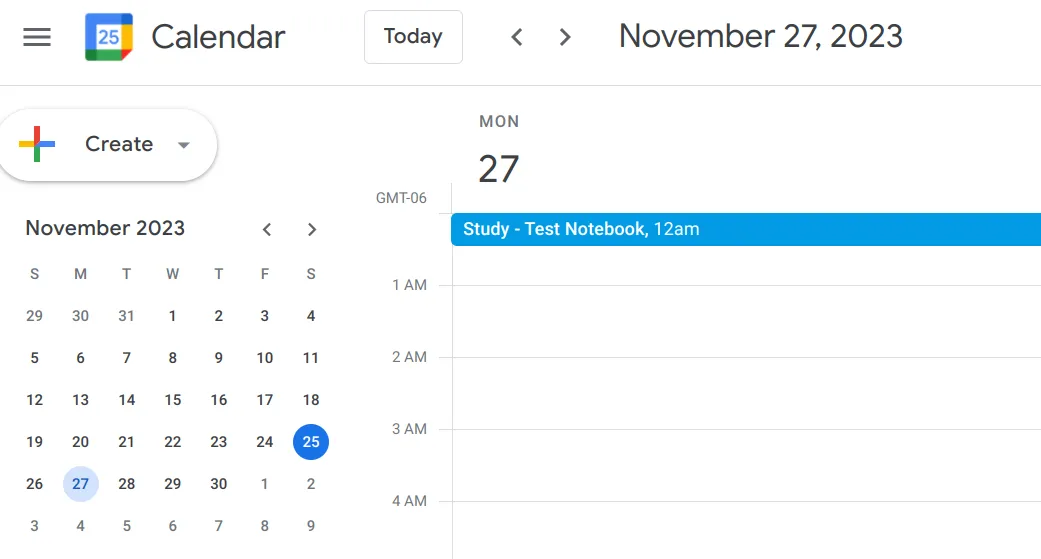
Testing the Webhook Live
After studying, our notebook will move to the waiting state. Since we setup our Webhook, Flotes will also notify our Google Calendar of the next optimal study date. This is a really convenient way to know the optimal time to review, without having to constantly check Flotes.